 |
 |
Thursday, April 12, 2012
 We can make a custom navbar using the Blogger Official Search and Navbar widget provided in different color schemes. This is again a great trick using the Iframe Technique. This idea came into my mind just last night when I observed that the source file of our blog had two Iframed widgets one is the poll widget and another is the Navbar. Fortunately, this is again a first time shared tutorial by us. Although we often remove Blogger Navigation bar but its Search function and share and follow links can prove very important.
 Below you can see a customized version of the same navbar in two modes.

When users Log out of Blogger, they see this:

On clicking the share link, readers can share your blog post on Twitter, Facebook, Google Buzz or Google Reader.

On clicking the follow button, you can follow the blog updates:

The following Navigation colours are available:
TAN:

BLACK:

SILVER:

BLUE:

Add Blogger Navbar To Sidebar
You can use the code below to add the Navbar anywhere you want and not just the sidebar. You can add it to your blog posts also. To add the widget to your sidebar simply do this:- Go to Blogger > Design
- Choose a HTML/JavaScript Widget
- and Paste the code below inside it,
Make these changes:<iframe
src="http://www.blogger.com/navbar.g?targetBlogID=8193278726666811965&
blogName=My+Blogger+Tricks&publishMode=PUBLISH_MODE_HOSTED&
navbarType=SILVER&layoutType=LAYOUTS&
searchRoot=http%3A%2F%2Fwww.mybloggertricks.com%2Fsearch&
blogLocale=en&homepageUrl=http%3A%2F%2Fwww.mybloggertricks.com%2F&"
marginwidth="0" marginheight="0" scrolling="no"
frameborder="0" height="30px" width="237px" id="navbar-iframe"
allowtransparency="true" title="Blogger Navigation and Search"></iframe>
- Replace 7193277726666811965 with your BLog ID. Go To Blogger > Design and now look in your browser address bar, you find a long digit code. Copy it and paste it in place of this number 7193277726666811965
- Replace My+Blogger+Tricks with your Blog Name. It is the name of your blog that you see in your blogger dashboard. Remember to separate each word with a plus sign (+)
- Replace SILVER with your prefered colour scheme in capital letters. You can try four colour schemes which are : 1) BLUE 2) BLACK 3) SILVER and 4) TAN
- Replace www.MyBloggerTricks.com with your blog link (exclude http://) If your blog URL is http://xyz.blogspot.com then simply write xyz.blogspot.com
View your blog and start playing with the official search box along with the free follow and share option. Have fun!
Thursday, April 12, 2012 0
 Removing blogger navigation bar is as easy as drinking a cup of tea! Below I have shared a pretty easy way of getting rid of that annoying nav-bar. The blogger navbar is a default feature that appears at the top of every blogger hosted blog. There are many reasons why you should remove the blogger navbar, some of which are mentioned below,
- It makes your blog look less professional
- You can be flagged by anyone!
- It allows your readers to view other member blogs by clicking the “Next Blog” button, which may contain objectionable content like adult explicit content!
Now you would agree with me, why I called it annoying. Before you may remove or hide blogger navigation bar please ensure that you have made a backup of your template.
BACKUP YOUR BLOGGER TEMPLATEAs we are adding code directly to the Blogger template for this customization, it is necessary to make a back-up of the existing template code. If suppose you get an error while customizing your template or you delete or break a code accidently, you will be able to easily restore your template.
To make a back-up of your Blogger template, go to Layout>Edit HTML in your Blogger dashboard, and look for the “Download full template” link near the top of the page.
Clicking on this link will prompt you to save your existing template to your computer hard drive. Save it somewhere so that you could find it easily while restoring your template.
REMOVING BLOGGER NAVBAR
Simply do the following,
- Go to layout > Edit HTML in your blogger dashboard
- Copy the code below, [Press “Ctrl + C” to copy & “Ctrl + V” to paste a code]
3. Press Ctrl+F and search for Variable definitions#navbar-iframe { height:0px; visibility:hidden; display:none }
3. Paste the above code just before/above Variable definitions

4. Save your template and enjoy the new look of your pro blog :)
 Cascading Style Sheet is the heart of designers and with latest web technology such as CSS3, designing has become even more interesting. Thanks to CSS3 attribute value selectors, now you can style any file extension or tag.
 I am using CSS3 attribute selector property in this tutorial to add Icons to hyperlinks. Previously we had to use JavaScript to add an icon next to the hyperlink on your blogger blog or website but now you can do it easily using CSS3. The icon will depend upon the type of file extension. If your link is pointing to a mp3 file then it will add a music symbol next to the link and so on. See the demo which shows 13 file format links,
How To Add Icons to Hyperlinks in Blogger?
- Go To Blogger > Design> Edit HTML
- Check the "Expand Widget Templates" Box
- Search for this,
]]></b:skin>4. Just above it paste the code given below,
/*--------- MBT Hyperlink Icons ----------*/
a[href*='.js'] {
background: url(https://blogger.googleusercontent.com/img/b/R29vZ2xl/AVvXsEiVQgnVnCoHedbZhKs3krmDYBnrD1QBKX4RfZyPiNj0P698lpVjwBunNWge7e3W1wQ2H3nN_XaEePTbEa6N5PNwcQNJEnutM6KM3ql0QSP1lPszH4w5UcNYLU9axQq2x4416EK_3Jt9YVU/s400/file_js.png) no-repeat 0 0;
padding:7px 0 0 25px;
}
a[href*='.gif'] {
background: url(https://blogger.googleusercontent.com/img/b/R29vZ2xl/AVvXsEgtgr7pvNmLvCp6-KdSwECGWaFv8GCVRW1yS5axbpAbMNnuG8p_tRcfSo1c8iK_ETvwhO5AEHU-07gyNExsErG3Ut8oyMi8QeXiTykNlka5TOnq5RepOSslOis5jslHCGV_Imqh1VmWdDc/s400/file_gif.png) no-repeat 0 0;
padding:7px 0 0 25px;
}
a[href*='.doc'] {
background: url(https://blogger.googleusercontent.com/img/b/R29vZ2xl/AVvXsEjfBxBAM-610D8oHPSUPtZj96pz-bl1jVg2t-GbigpTX63kMPqdz8a8FcvKQjif1odgv80EVoOfOilgqLyiA_Ap25jBxi_fFVmQDjBff_7Jiq5N3hRcwYa8xcl9yKXGMcdFfnrfHQHiVvg/s400/file_doc.png) no-repeat 0px 0px;
padding:7px 0 0 25px;
}
a[href*='.rar'] {
background: url(https://blogger.googleusercontent.com/img/b/R29vZ2xl/AVvXsEgxiMPh1FhwC8_2IxwgRxfkwHGfRnH9H5IxuJHV353K_5WaH2amxmt2hI4Luaj8SrlFSpTswV5ksgUxtcRgPFf880_SHIXNOFl3eyfa9JQZUg7eZjFLCPQzFseNdkyMkSGAehF_Ato0pYU/s400/file_rar.png) no-repeat 0px 0px;padding:7px 0 0 25px;
}
a[href*='.zip'] {
background: url(https://blogger.googleusercontent.com/img/b/R29vZ2xl/AVvXsEhLsnQW7HV2K5Ko7mxrD6xiZUHhNgDCbvRDD6R7HtTMMmb-HUz6vT7saLNtzAEjQtU1GPCUxO93WP_jiFozyt0-KypCf5LwJaFPtNhWoghv9AT_tGuII0D7xFiMN-WYUEdfD-EFbd-IqLk/s400/file_zip.png) no-repeat 0px 0px;
padding:7px 0 0 25px;
}
a[href*='.mp4'] {
background: url(https://blogger.googleusercontent.com/img/b/R29vZ2xl/AVvXsEjVkjOF7dJWx_E4kp5vImPmKiah0RhK9SHChnO4JpOZYlaK96LBB5LV2OZuU7m55R3gV5gA5058387cSVyv9T8hoD74XbBlVgmVNAxShlgSRUwLjKDQPmoLCqXCnEi5zN0GU8c5sLgJdlA/s400/file_mp4.png) no-repeat 0px 0px;
padding:7px 0 0 25px;
}
a[href*='.php'] {
background: url(https://blogger.googleusercontent.com/img/b/R29vZ2xl/AVvXsEj2x5e3FsoQwxvcD3UknBDWxmXvlJGHRpQGmceWpMhmJM8_vbDeptKm5fZM676kA5UFLajHz-q_UAK8tZ1EVwWlTensyBHjlSQrHXm-3jXoiqkx9tJWLnK9YxVvuqkKRoSkbhvvXgNILFY/s400/file_php.png) no-repeat 0px 0px;
padding:7px 0 0 25px;
}
a[href*='.xml'] {
background: url(https://blogger.googleusercontent.com/img/b/R29vZ2xl/AVvXsEgWtAUpJvv_iCFQg_IXl_1qzzZId8eL2e7AgG0pDOGrZQaO_WsJApEF8ojHu_WzsFYiUl5SvNNtVxKoshEMnJfE6FbznFOC59Iie2aCrkrlJBWOVeoJdcfunjG6Nld7qfJQ67mPP0TVK0o/s400/file_xml.png) no-repeat 0px 0px;
padding:7px 0 0 25px;
}
a[href*='.pdf'] {
background: url(https://blogger.googleusercontent.com/img/b/R29vZ2xl/AVvXsEj0MbSQvMkObBhhOf1lMY1AEXJnH-O4GfP-Qs2qGL6u3sGIbz7I9hZ6WCQSCid7at07S_O0opIk6NVtQv47IKu8gwq8YyBfl7LqcclglhRVM34P2TKixqUjI1vjw02TfcKpPRIKqYhZ9fw/s400/file_pdf.png) no-repeat 0px 0px;
padding:7px 0 0 25px;
}
a[href*='.xls'] {
background: url(https://blogger.googleusercontent.com/img/b/R29vZ2xl/AVvXsEjrYm3oHJYMH-nUdFEX1O-JVbFJfnw4si2kCnNgrFtNvj_UcGCmFhfEujbZC8-pr8lhNNN5jJ63hKLHie1eEZ7lT-rBXSKVDMX305kaFsNivXbHZJDEyUBE7ZG5em0ZMYwK31hWSjwvpEA/s400/file_xls.png) no-repeat 0px 0px;
padding:7px 0 0 25px;
}
a[href*='.mpg'] {
background: url(https://blogger.googleusercontent.com/img/b/R29vZ2xl/AVvXsEgSpKXkW2m03MGaRHVTvV5YSAWNYN79BU-zXRnNP3VnjJfCyH0eWvcDZmR-9-9ANhPC6YibNTt136UaCI0YANxTg4n8Elm7dAbwug5g6zryWsoUt8hOjBZJfMsGEt45IlXCSAWSy91ILig/s400/file_mpg.png) no-repeat 0px 0px;
padding:7px 0 0 25px;
}
a[href*='.bmp'] {
background: url(https://blogger.googleusercontent.com/img/b/R29vZ2xl/AVvXsEht_PCPpFcHyetlwCHHBsyr1-T4mcnGHELRKh3NFESCO8P7PP39e1zZNwat7gWU7M4tUxTcsGWcVI47lT-bGp0bZfcrsKFttT2z_RZQ-wh-E9Zm9lup_kcIfn12woBzRewBiphXJivfPJU/s400/file_bmp.png) no-repeat 0px 0px;
padding:7px 0 0 25px;
}
a[href*='.avi'] {
background: url(https://blogger.googleusercontent.com/img/b/R29vZ2xl/AVvXsEjoEWRg8A8qnyzUGIikFWAkto3fswB3vH_CMqPGJETLUuQlkqADp2hwgug45aDgb4U1kqpw0Qv-xpwk_r9lwlomUlMWs_zKEhepv6Z3vA8adEyrnPcc_ppMaEW44LacVniDTI6AR2OTHPc/s400/file_avi.png) no-repeat 0px 0px;
padding:7px 0 0 25px;
}
a[href*='.mp3'] {
background: url(https://blogger.googleusercontent.com/img/b/R29vZ2xl/AVvXsEho1_HEIqtDhFVSE3zr157ayv2Gy8v1WcggPNmUTyrwLlWJJhv5r0Z0Hyr6LYGIFhaeGGQFClwVlWFFfuXx4MZjh1OIqQInEzDq1oMbYnzZtL1JkUge_SLTUnUYKG0XVASv1AOJR6v2n4g/s400/audio_alt.png) no-repeat 0px 0px;
padding:7px 0 0 25px;
}
a[href*='mailto'] {
background: url(https://blogger.googleusercontent.com/img/b/R29vZ2xl/AVvXsEiKaxAOWUAgFJ_QWciFFgX3OQYxMe1LqIcDWlcXEf6KLvKyoBvyYdUpoi82ctHr9VgYAutBOOUH6Jp-eQqbkvvbfJSKd-8AByBVi16CJYNvscwWDDYu6vmOAYVAaxUh-tKC4WyMap-24_Y/s400/e_mail.png) no-repeat 0px 0px;
padding:0 0 0 25px;
}
4. Save your templates and you are done!
How it works?
The icons appear when the file extension is detected in the link. For Example if I add a link to pdf file like this,<a href="http://www.mybloggertricks.com/xyz.pdf">Download E-book</a>Then the link will appear like this when I publish it,

Now add any Ebook or any image link in your blogger posts, sidebars or footer anywhere you want and you will find cute icons appearing next to the link. You can also use icons of your choice by simply changing the icon image links in the code above. The code is really easy to edit and I hope after having read so much of our tutorials you can at least edit this code. Have fun and let me know if you faced any problem. Enjoy! :)
 Providing your readers with easy navigation and fun-to-use tools should always be your first priority. Whether it may be a video blog like YouTube or it may be any forums, all these great sites have a reply link attached to each comment posted on the site. Fortunately we can even add this extremely useful Reply Link to our blogger blogs to make it even more better. On clicking the reply link or reply button, an anchor link to that comment post is pasted in blogger comment pop-up form. That link will show who has been responded or replied. You can see it working just fine on MBT Comments. I am sure you would love to add it to your blogs too. So let's do it!
Add Your Personalized "Reply Link" To Blogger
- Go To Blogger > Design > Edit HTML
- Backup your template
- Click the "Expand widgets Templates" Box
- Search For ]]></b:skin>
- and paste the code below just above it,
/*--------------MBT Reply Link --------------*/Make these changes:
.MBT-replycomments{
background:#ECEAEA;
cursor:pointer;
color:#fff;
margin:5px 0;
float:right;
border:none;
padding:4px;
-moz-border-radius:6px;
-webkit-border-radius:6px;
border-radius:6px;
font:10px sans-serif;
}
.MBT-replycomments:hover{
background:#E7E7E7;
}
- To Change the Link background on active mode edit #ECEAEA
- To Change the Link Background color on mouse hover edit #E7E7E7
- Our Color Generator tool will be helpful
<dd class='comment-footer'>or just this,
class='comment-footer'and just above it paste the "Reply Link" Code below,
<div class='MBT-replycomments'><a expr:href='"https://www.blogger.com/comment.g?blogID=*******************&postID=" + data:post.id + "&isPopup=true&postBody=%40%3C%61%20%68%72%65%66%3D%22%23" + data:comment.anchorName + "%22%3E" + data:comment.author + "%3C%2F%61%3E#form"' onclick='javascript:window.open(this.href, "bloggerPopup", "toolbar=0,location=0,statusbar=1,menubar=0,scrollbars=yes,width=650,height=650"); return false;'>Reply..</a></div>
- You can replace the text Reply.. with anything you like
- Replace with your BLOG ID. If your are logged into your blogger account then look at your browser address bar. You can clearly see a 18-19 digit code. Just copy it and paste it in place of *******************

7. Save your template and view your blog comments the WordPress way! :>
 Highlighting and customizing author comments differently from visitor comments is a very important step that you must take as soon as possible because this will make author comments more prominent to the visitors and will therefore encourage visitors to take part in the discussion and better communicate with the author. The blogger comment block consists of three important sections which are,
- Comment-author
- Comment-body
- Comment-footer
Highlight and Customize Comments in Blogger
- Go To Blogger > Design > Edit HTML
- Backup your template
- Check "Expand widget templates" Box
- Search for this.
]]></b:skin>5. Just above it paste the CSS code below,
.mbt-comment-body {Make these changes:
background: #FFFFFF;
color: #008000;
border: 1px solid #008000;
margin:0;
padding:0 0 0 10px;
width:520px;
}
- To Change the background color of author comments change #FFFFFF
- To change font color change #008000
- To change border size change 1px, to change border style change to solid, dashed or dotted and to change the color of the border change #008000
- To change the width of the comment body change 520px
6. Next search carefully for this code in your template,
Tip: Press Crtl +F and search for one line at a time
<data:commentPostedByMsg/>7. Replace it with the following code,
</dt>
<dd class='comment-body'>
<b:if cond='data:comment.isDeleted'>
<span class='deleted-comment'><data:comment.body/></span>
<b:else/>
<p><data:comment.body/></p>
</b:if>
</dd>
<data:commentPostedByMsg/>8. Save your template and you are done!
</dt>
<b:if cond='data:comment.author == data:post.author'>
<dd class='mbt-comment-body'>
<p><data:comment.body/></p>
</dd>
<b:else/>
<dd class='comment-body'>
<b:if cond='data:comment.isDeleted'>
<span class='deleted-comment'><data:comment.body/></span>
<b:else/>
<p><data:comment.body/></p>
</b:if>
</dd>
</b:if>
Visit your blogs and see that the author comments now look something like this,

Let me know if you faced any problem. Would be a pleasure helping you. In my next post I will share several ways of customizing author comments. Have Fun! :)
 There are many people who still do not understand what a blog is or why is blogging so much expanding in the cyberspace. I feel all these people deserve the right to know what a Blog is and how can a Blog be created along with some other similar questions. So for those who just heard of a Blog from their friends, media or any other source, here is a short and precise illustrative tutorial to help you find answers to four important questions in most people’s mind.
 - What is a Blog?
- How do I create a Blog?
- What is the advantage of blogging?
- What is Blogger or Wordpress?
What is a Blog?
A blog is nothing but an Online Notebook Diary. What do we write in a notebook diary? Of course stuff that we like and things that we feel important to be recorded and shared with our friends and family. A notebook diary can be based on any topic that you like for example you can write on your hobbies, activities, poems, songs, tutorials, pets, home and family, your personal thoughts etc. People will read your Online Notebook Diary on daily basis and will leave you a comment, suggestion or feedback.
If you write about your personal experiences in a notebook made up of papers, then your writings will reach only limited people around you but with an online diary like a Blog you speak to the world!
So in short a blog is your Personal website where you write and share things you like with millions of people out there who are eager to read what is cooking in your mind!
The video below will give you a more illustrative view of a Web Blog.
How do I create a Blog?
Creating a blog is absolutely free. There are many quality Blogging hosting services that you can choose to create a blog but the best among them is Blogger. I have created this blog with Blogger without even paying a penny! Want to know how? Watch this video to know how to create a blog in less than Five minutes!
What is the advantage of blogging?
You pay nothing Instead you Earn in $$ !! You earn by displaying advertisements on your Blog. People are earning from $100 to $100,000 monthly! I am not kidding an example is shoemoney.com and problogger.net
Plus you will make new friends in the Blogosphere and you earn respect in the eyes of thousands of people. You can become a celebrity! But all this with a little hard work and great patience.
And the best advantage which I have experienced is that you learn every second online! Your internet and computer skills will improve to an extreme edge and this is what the coming era demands from you. Every second on blogging is undoubtedly a new experience! I have learnt HMTL, CSS, XML and a bit of JavaScript without taking any classes. I learnt them all within a year of my blogging career and today I am able to design a quality blogger template in less than three hours MashAllah!
What is Blogger or Wordpress?
These are the major blogging platforms which help you create a free Blog. But if you are confused which one to start with then go for Blogger. It has many features which wordpress doesn’t have and the best part is that Blogger allows you to customize your template in any way you like by editing the CSS style sheet! So what are you looking? Start blogging now and build up a new cyber life. Best of luck!
To know in detail whether Blogger is better or WordPress then read this post –> Comparison Chart 2010 for WordPress Vs Blogger
Feel free to ask any question that is still troubling your mind. Take care :>
Giving a mature and professional look to your "About Us" webpage should be amongst your first priorities. Visitors have the right to know who you are and what you do and where you belong. Your About Us page is your Identity page where you add a little bio of your self and then explain the purpose of your blog or website. It's the most important page for both your regular visitors and advertisers. So Make sure you leave a good impression on them by presenting your self well. Just an hour ago I designed my personal "About Me" Page and I hope the tutorial today will make sense once you see this new proposed design,
What's New In it?
The Design includes 4 most important features which are:- All Blogger Widgets below Post titles and at the bottom are kept hidden
- Three beautiful Rows Describe your Entire Concept of Website i.e 1- Your Bio, 2- Blog Purpose and 3- Concluding paragraph.
- Passive Voice Speech is used to make things look professional
- It Loads in Seconds
How To Create this About Us page?
For this tutorial I will suggest that you use Windows Live Writer. WLW will make your page design even more neat and clean. So lets get to work!- Copy all data in your about us page in a notepad and keep it safe.
- Delete every thing in your about page and start writing a fresh bio about yourself in no more than 3-4 lines. Then add an your best picture to the left of your bio. See the example below,
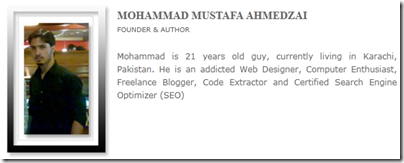
3. Now you need to add some rows/paragraphs where you can talk about your services, goals etc. I would advise that you create at most two-three rows and keep them short in length. Use passive voice and avoid using "I am this and that" rather use a tone that may sound as if someone else is describing the author. Once you have written down the paragraphs then start enclosing each paragraph one by one between this code,
<div style="border: #686868 5px solid; padding: 10px; -moz-border-radius: 15px; -webkit-border-radius: 15px">
<div style="text-align: justify"><img style="display: inline; float: right" align="right" src="ADD IMAGE LINK HERE" width="128" height="128" /></div>
<div style="text-align: justify"><font color="#666666">
ADD PARAGRAPH TEXT HERE
</font></div>
</div>
<div style="text-align: justify"> </div>
Do it for each paragraph. For example if you have written three paragraphs then enclose them in the codes like this,
<div style="border: #686868 5px solid; padding: 10px; -moz-border-radius: 15px; -webkit-border-radius: 15px">
<div style="text-align: justify"><img style="display: inline; float: right" align="right" src="ADD IMAGE LINK HERE" width="128" height="128" /></div>
<div style="text-align: justify"><font color="#666666">
ADD PARAGRAPH-1 TEXT HERE
</font></div>
</div>
<div style="text-align: justify"> </div>
<div style="border: #686868 5px solid; padding: 10px; -moz-border-radius: 15px; -webkit-border-radius: 15px">
<div style="text-align: justify"><img style="display: inline; float: right" align="right" src="ADD IMAGE LINK HERE" width="128" height="128" /></div>
<div style="text-align: justify"><font color="#666666">
ADD PARAGRAPH-2 TEXT HERE
</font></div>
</div>
<div style="text-align: justify"> </div>
<div style="border: #686868 5px solid; padding: 10px; -moz-border-radius: 15px; -webkit-border-radius: 15px">
<div style="text-align: justify"><img style="display: inline; float: right" align="right" src="ADD IMAGE LINK HERE" width="128" height="128" /></div>
<div style="text-align: justify"><font color="#666666">
ADD PARAGRAPH-3 TEXT HERE
</font></div>
</div>
<div style="text-align: justify"> </div>
Make these changes:
- To change the border color of the paragraph edit #686868 with your preferred color choice. Use our color generator tool.
- Replace ADD IMAGE LINK HERE with the URL of your image. Try to you use a small image 128px by 128px in size.
- To adjust the image size edit width="128" and height="128"
Hide Widgets
Now we need to hide all widgets that appear below post titles and at the bottom of posts. These widgets are normally the social bookmarking icons, AdSense code and related post widget which appears on all your posts. To hide them kindly follow these steps,- Go To Blogger > Design > Edit HTML
- Backup your template
- Check the "Expand Widget Templates" box
- Search for ,
<data:post.body/>and just above it enclose all your widget codes between the code below,
<b:if cond='data:blog.url != "ADD YOUR ABOUT US PAGE URL HERE"'>
WIDGET CODES
</b:if>
Add all your widget codes between these two bolded lines. Replace ADD YOUR ABOUT US PAGE URL HERE with your About Us page link.
5. Do the same for all the widget codes below <data:post.body>
6. Finally save your template and visit your blog to see the page loading in seconds with a neat and clean look.
Need Help?
If you needed any help just feel free to post your queries. I will reply the earliest possible. I just hope you succeed in creating an attention seeking About Us page that may let your blog stand out! Have fun. :>
Subscribe to:
Posts (Atom)


